
Repurposed plastic bottle flower arch
- Feb 9, 2018
- 2 min read
I've finally completed my latest garden project: a colourful flower arch created using repurposed plastic drinks bottles.

I'll be honest, I copied this idea from an art installation I saw at West Dean College during the 2017 Chilli Festival. I wish I'd made a note of the artists' names so that I could credit them (if anyone has this information please let me know). Their version was far superior to mine, but I loved the idea and wanted to try it for myself.
What I did
1. bought and erected a cheap arch from Wilko's (it was late season and this had been reduced to £4)
2. cleaned out about 200 plastic drinks bottles, cut each one into two flower shapes and spray painted around 2/3 of these
3. joined the flowers together in strips of 12 using eyelets
4. wound them around the arch joining the next strip on every time I reached the end of one, occasionally using cable ties to attach them to the structure


Problems I encountered on the way - and how to avoid them!
Not all of my projects go smoothly. This one was so difficult I almost gave up on it, although I'm very pleased with the end result.
BOTTLE AVAILABILITY: Pre-coloured bottles work much better than spray painted ones but these were hard to find; fizzy drinks almost always come in clear or green bottles nowadays. Fruit Shoot and similar children's fruit drinks come in suitable bottles, unfortunately I did not have access to many of these. If you know of a cafe which sells this type of drink it might be worth asking them for their used bottles. You need a lot of them, I used about 200 and to be honest I think it would have looked better with even more.
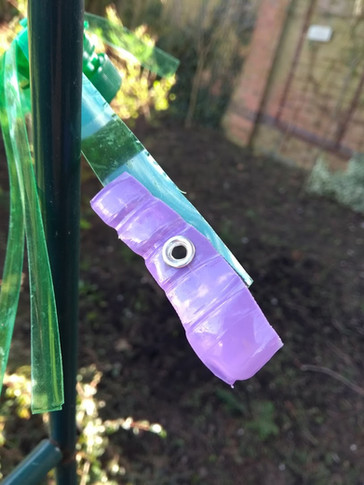
FLOWER DESIGN: Initially I designed some really lovely shapes with thin petals, but these were not wide enough to include eyelets. You also need to be careful not to cut into the point where the petal joins the centre of the flower as this will create a weak point and result in broken flowers, as shown in the first photo below.
PAINT: I used paints marked as suitable for outdoor use and tried a selection of cheap and premium brands (Wilko, Hammerite and Plasticote), but some of the finishes were quickly damaged by rain as shown in the second photo below. Later on I started spraying the flowers with a primer first and these have lasted much better, although the colours are not quite as vivid.
FASTENINGS: My initial thought was to use glue to fasten the flowers together, but this proved impractical. I tried a glue gun (which melted the plastic), standard superglue (which didn't stick at all) and loctite "all plastics" specialist glue (which claimed to be suitable and did work for a day or two, but then went brittle and broke). Eyelets worked brilliantly and don't particularly detract from the appearance of the flowers.


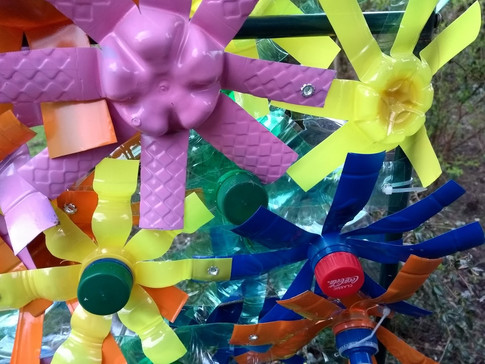
Gallery: the end result


Comments